Easy Homemade Bagels: Bakery Quality Made Simple
Imagine biting into a perfectly golden, delightfully chewy bagel, still warm from the oven, its crust giving way to a soft, dense interior. Now, imagine that bagel came from *your* kitchen. For many, the idea of making bakery-quality bagels at home seems daunting, reserved for seasoned bakers with secret techniques. But what if we told you that achieving truly
very good bagels easy ish too? It’s not just a dream – it’s a delicious reality well within your reach. This comprehensive guide will demystify the process, turning you into a homemade bagel hero with minimal fuss and maximum flavor. Forget dry, flavorless store-bought imposters; get ready for a homemade revolution!
Why Homemade Bagels Are a Game Changer
There's an undeniable magic in pulling a tray of warm, fragrant bagels from your own oven. It’s an experience that transcends mere cooking; it’s a moment of culinary triumph. Unlike many other bread recipes, making bagels from scratch delivers a distinct satisfaction that’s hard to beat. Store-bought bagels often fall short, tasting more like a dense roll than a true bagel – lacking that characteristic chew, the subtle sweetness, and the satisfying crust.
Homemade bagels offer several distinct advantages:
*
Unrivaled Freshness: There’s simply no comparison to a bagel eaten within an hour or two of baking. The aroma alone is intoxicating!
*
Superior Texture and Flavor: With a few key techniques, you can achieve that sought-after soft inside, wonderfully chewy outside, and rich, complex flavor that makes
Better Than Store-Bought: Your Easy Guide to Homemade Bagels.
*
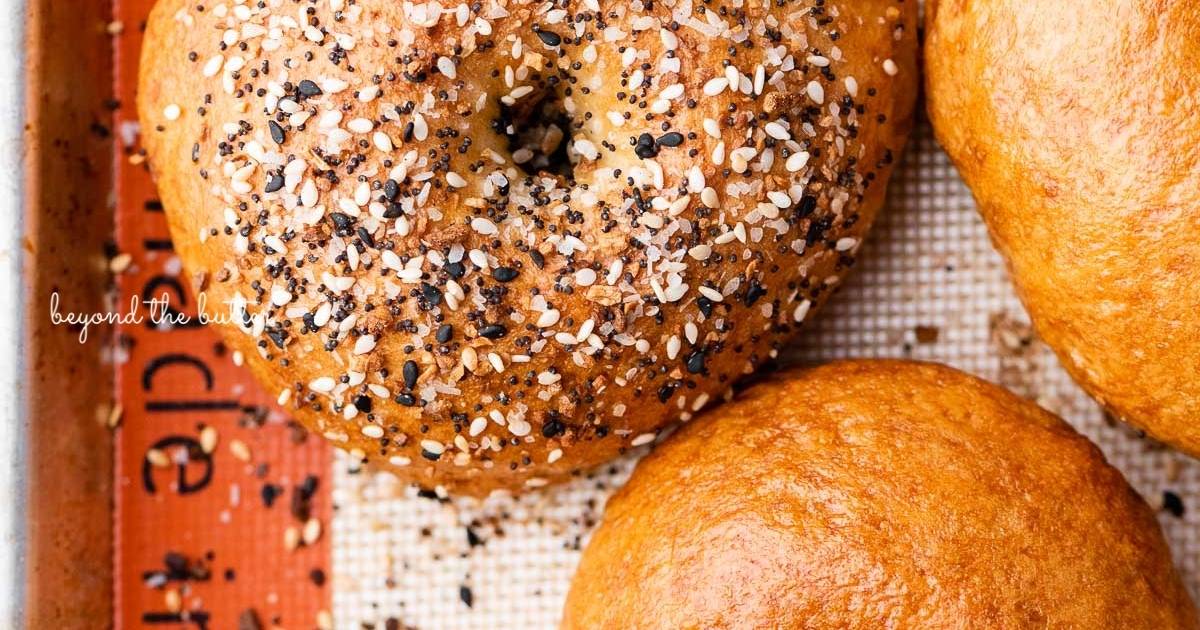
Customization Galore: From classic sesame and poppy seed to savory everything bagels or sweet cinnamon raisin, you have complete control over your toppings and mix-ins.
*
Kitchen Rockstar Status: Making bagels feels impressive, and it truly is. Be prepared for compliments from friends and family!
*
Cost-Effective: Once you have the basic ingredients, making a dozen bagels is far more economical than buying them individually from a specialty bakery.
If you’ve ever hesitated, thinking bagels were too complex or required special equipment, we promise you, they’re not. With a little patience and an understanding of a few fundamental steps, you’ll be hooked on the homemade goodness.
The Secrets to Bakery-Quality Chewy Bagels
The journey to perfect homemade bagels hinges on a few essential elements that differentiate them from standard bread. These are the "secrets" that ensure your bagels aren't just bread shaped like bagels, but truly authentic, chewy masterpieces.
1. The Low-Hydration Dough & Kneading
Unlike many other bread recipes that call for wet, sticky doughs, bagels are crafted from a relatively low-hydration dough. This means less water, resulting in a firm, somewhat stiff mixture. This stiffness is crucial for developing the robust gluten structure that gives bagels their signature chew.
*
Why it matters: Proper kneading develops the gluten strands in the flour, creating a strong, elastic network. Without this, your bagels will be soft and bread-like instead of dense and chewy.
*
The easy way: While you can knead by hand, a food processor or stand mixer makes the process incredibly swift. In a food processor, the dough can come together in as little as 90 seconds! This rapid action is incredibly efficient at building gluten.
2. The Magic of Barley Malt Syrup
This ingredient is often considered a baker's secret weapon for bagels. Barley malt syrup is a thick, sticky sweetener derived from sprouted barley.
*
Why it matters: When added to the dough and the boiling water, barley malt syrup contributes a distinctive subtle sweetness, a beautiful deep golden-brown color during baking, and significantly enhances the bagel's characteristic chewy texture. Its enzymes also help with fermentation and crust development.
*
Alternatives: If barley malt syrup is difficult to find, you can substitute with honey, molasses, or even brown sugar in a pinch, though the flavor and color might be slightly different. For the boiling water, some recipes suggest a touch of baking soda for a similar effect on the crust.
3. The Essential Egg Wash
An egg wash is a simple but powerful tool for achieving that glossy, golden-brown finish that makes bakery bagels so appealing.
*
Why it matters: Brushing the bagels with a whisked egg (sometimes with a splash of water or milk) before baking creates a rich, shiny crust. The proteins in the egg caramelize in the heat, contributing to both color and a slightly crisp texture. It also helps toppings adhere beautifully.
*
Commercial Twist: While home bakers use an egg wash, commercial bakeries often rely on the residual sugars from the barley malt in the boiling water to achieve a similar sheen. For home baking, the egg wash is a fantastic, reliable method.
Your Step-by-Step Guide to Perfect Homemade Bagels
Ready to roll up your sleeves? Here’s how you can make
Foolproof Chewy Bagels: Simple Steps for Delicious Results that rival your favorite bagel shop.
What You'll Need:
* All-purpose flour (or bread flour for extra chew)
* Instant yeast
* Salt
* Warm water
* Barley malt syrup (or alternative)
* Egg (for egg wash)
* Your choice of toppings (sesame seeds, poppy seeds, everything bagel seasoning, coarse salt, etc.)
Equipment:
* Food processor or stand mixer (optional, but highly recommended)
* Large mixing bowl
* Kitchen scale (for precise portioning)
* Large pot for boiling
* Slotted spoon or spider
* Sheet pans
* Parchment paper or silicone baking mats
* Tea towels
The Process:
1.
Combine Dry Ingredients: In the bowl of your food processor or stand mixer, whisk together the flour, salt, and instant yeast. Ensure they are well combined.
2.
Mix Wet Ingredients: In a separate bowl or measuring cup, whisk together the warm water and barley malt syrup until dissolved.
3.
Form the Dough: Add the liquid ingredients to the dry ingredients.
*
Food Processor: Process for 90 seconds until the dough comes together into a cohesive, somewhat shaggy ball. It should pull away from the sides of the bowl.
*
Stand Mixer: Using the dough hook, mix on low speed until combined, then increase to medium-low and knead for about 5-7 minutes until the dough is smooth and elastic.
4.
First Rise (Cold Fermentation): Lightly grease your hands with a bit of olive or grapeseed oil. Transfer the dough to a lightly oiled bowl, turning to coat. Cover the bowl with a lid or plastic wrap.
*
Overnight Rise (Recommended): For optimal flavor development and easier handling, transfer the covered bowl to the fridge and let it ferment slowly for 12-24 hours. This cold fermentation is key for that deep, complex bagel flavor.
*
Same-Day Option: If you're short on time, you can let the dough rise at room temperature for 1-1.5 hours, or until doubled in size.
5.
Portion and Rest: Turn the cold dough out onto a lightly floured work surface. Using a kitchen scale, portion the dough into 12 equal pieces (around 100-110g each). Roll each piece into a tight ball and arrange them on a lightly floured surface or parchment-lined sheet. Cover with a clean tea towel or plastic wrap and let them rest for 1 hour at room temperature. This relaxes the gluten, making shaping easier.
6.
Shape the Bagels: This is where the fun begins! Take one dough ball. Using your thumb, poke a hole directly through the center. Then, gently stretch and rotate the dough with both hands, working your thumbs around the inside of the hole to widen it to about 1.5 to 2 inches. Don't be afraid to be a bit aggressive – you want a well-defined hole that won't close up during baking. The hole helps ensure even cooking.
7.
Prepare for Boiling: Preheat your oven to 425°F (220°C). Fill a large pot with water (at least 4-5 inches deep) and bring it to a rolling boil. Add 1-2 tablespoons of barley malt syrup (or honey/sugar) to the boiling water for extra flavor and browning. Line your sheet pans with parchment paper.
8.
Boil the Bagels: Gently drop 2-3 bagels into the boiling water at a time, ensuring they have enough space. Boil for 30 seconds on each side. For an extra chewy bagel, you can boil for up to 60 seconds per side. Use a slotted spoon or spider to carefully transfer the boiled bagels to a tea towel-lined sheet pan to drain excess water, then move them to your parchment-lined baking sheets.
9.
Egg Wash and Season: In a small bowl, whisk one egg with a tablespoon of water or milk. Brush the tops and sides of each boiled bagel generously with the egg wash. This is the perfect time to dip them into your desired seasonings – sesame seeds, poppy seeds, everything bagel blend, or coarse salt.
10.
Bake Until Golden: Transfer the sheet pans to your preheated oven. Bake for 18-22 minutes, or until the bagels are beautifully golden brown and sound hollow when tapped on the bottom. If you have two trays, rotate them halfway through baking for even browning.
11.
Cool and Enjoy: Let the bagels cool on a wire rack for at least 15-20 minutes before slicing. This allows the internal structure to set properly.
Beyond the Bake: Toppings and Serving Suggestions
Once your gorgeous,
very good bagels easy ish too are cooled, the possibilities are endless! Slice them open and load them up with your favorite fillings.
*
Classic Cream Cheese: A thick smear of plain, scallion, or lox cream cheese is a timeless choice.
*
Savory Sandwiches: Elevate your breakfast or lunch with eggs, bacon, cheese, or even smoked salmon and capers.
*
Fresh & Healthy: Top with avocado, sliced tomatoes, cucumbers, and a sprinkle of everything bagel seasoning.
*
Sweet Treats: For cinnamon raisin bagels, a simple schmear of butter or cream cheese is perfect.
Don't forget to invite some friends over for brunch – sharing these homemade delights is half the fun!
You've now unlocked the secret to truly outstanding bagels right in your own kitchen. The process, while requiring a few distinct steps, is surprisingly straightforward and incredibly rewarding. From the satisfying kneading of the dough to the delightful aroma filling your home as they bake, every stage of making these
very good bagels easy ish too is a joy. So, ditch the store-bought, embrace the satisfaction of homemade, and prepare to impress everyone (especially yourself!) with your newfound bagel-making prowess. Your taste buds will thank you.